Thanks to their affordability and simplicity, brushed RC motors are ubiquitous in RC vehicles. To properly maintain your brushed motor, however, you’ll need to clean it from time to time. By taking the time to freshen it up periodically, you can ensure it lasts for thousands of hours.
Here’s how to clean a brushed RC motor:
- Remove the brushed motor from your RC car.
- Wipe the exterior of the motor clean.
- Dust off the motor with compressed air.
- Spray the motor with a motor cleaner.
- Dry out the motor completely.
- Lubricate the motor.
- Put the cleaned and oiled motor back in the RC car.
How to Clean a Brushed RC Motor?
Thankfully, cleaning your motor is a relatively simple process that I’ll break down for you into clearly defined steps.
1. Remove the Brushed Motor From Your RC Car
To clean your RC car’s brushed motor as thoroughly as possible, you’ll need first to disconnect it from the vehicle, set it aside, and prepare it for cleaning.
- Flip your RC car over and set it on a stable surface.
- Remove the vehicle’s outer body to expose the chassis; you’ll probably need your screwdriver for this, and the screws could potentially be different sizes depending on your particular vehicle.
- If your vehicle has a large bumper, you might want to remove it as well to keep it out of the way. The same goes for any external features on the car that block your access to the motor: go ahead and remove them if possible.
- You will likely have to remove the pinion gear holding the motor in place to access the motor. Be sure to keep it and any other screws or small parts nearby on a tray to keep them from rolling away or getting lost while you’re cleaning your motor. Thankfully, most modern RC cars with brushed motors have a simple pair of plugs you can easily disconnect without any extra tools or devices. Just be sure you don’t pull on them too hard while you disconnect them.
- Disconnect any additional wiring, and either write down or make a mental note of exactly how the car is wired for when you reinstall the motor later. You could even take a video of the process or photos periodically to track your progress if you’re not particularly confident in your ability to take the car apart yet.
It might also be helpful to keep an inventory of all of the screws, washers, wires, and other parts of your RC car you’re disassembling so you can be sure everything is in order.
TIP: If you make any mistakes or forget how the car was wired, don’t fret; check your manual for the car or, if you’re really in a bind, try to contact the manufacturer to be sure you’re disassembling everything correctly. You could even try checking in with other RC hobbyists who own similar vehicles online if you have any issues.
2. Wipe the Exterior of the Motor Clean
Most RC hobbyists tend to go straight into the compressed air dusting step, but I think it’s a good idea to wipe the outside of the motor off carefully with a towel first. Any old towel will work just fine, whether it’s terry cloth, microfiber, or even paper.
Moisten your cloth very slightly and wipe down the outside of the motor to get rid of any caked-on debris. If you encounter any particularly stubborn grime, use a moist, soft-bristled toothbrush to scrub the surface gently. This will make the next step a bit easier, as your compressed air won’t have to do all of the work.
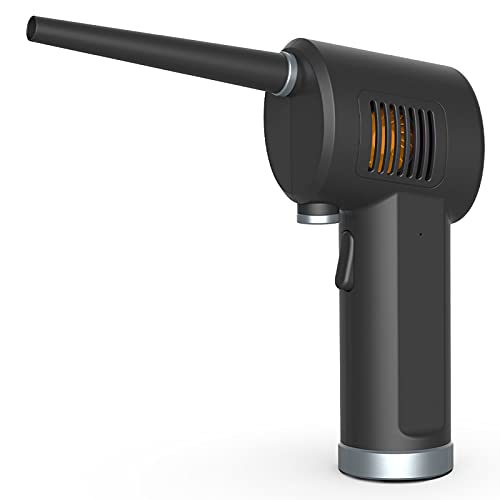
3. Dust Off the Motor With Compressed Air
At this point, your motor should be completely detached from your RC car, and the parts you’ll need when you put it back together later should be neatly laid out on a tray nearby for later. Your next step will be to dust the motor with your air duster.
Here are a few tips when dusting your motor:
- A long thin nozzle will help you get into the tiny crevices within the motor and blow out any dirt, dust, and other debris it has accumulated over time.
- Carefully spray into the vent holes and blast any dust off of the bearings and exterior of the motor as well.
- You may want to do this over a towel or a tray to collect any debris that falls out of the motor, especially if it hasn’t been cleaned in a while–or ever.
- If the exterior of the motor still looks dirty, you can wipe it off with a paper towel or a lightly moistened baby wipe if you wish. Just spray the motor until you don’t see any more dust or dirt coming off of it.
NOTE: You might still notice some grime in the holes and crevices of the motor; this is normal, and we’ll be cleaning that more thoroughly in the next step with our motor cleaner.
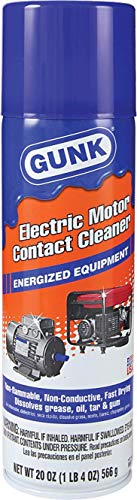
4. Spray the Motor With Motor Cleaner
At this point, your motor should already be looking a lot less grimy than it was previously. Now you’ll want to spray it down with your motor cleaner. Electric motor and parts cleaners remove dust, grime, and grease from your contacts and can extend your brushed RC motor’s life.
Either Gunk NM1 Electric Motor Contact Cleaner or Permatex Electrical Contact and Parts Cleaner will do the job perfectly.
You’ll be using the same technique you just used with the can of compressed air in the previous step, but the exterior should be reasonably clean by this point. You will now use the motor cleaner or electrical contact cleaner to clean out any remaining dirt and dust from the inside’s hard-to-reach places.
Here are a few tips when cleaning your RC motor with motor cleaner:
- You should be using a long, thin nozzle attachment on the cleaner for this part, too; fortunately, most cleaners of this type come packaged with such an attachment or are already shaped perfectly for tight spots.
- Keep in mind that your motor will leak and drip a lot of residue as it is cleaned, so you will probably want to clean it over a small container or bowl of some kind to catch the grime as it falls out.
- Hold the motor up with one hand by its plugs and spray it thoroughly, taking extra care to clean the vent holes and fan holes. These areas will be the dirtiest, and they’ll also take you the longest to clean.
- Keep spraying until the liquid coming off of the motor is clear like water. It might take several minutes, but keep it up. You may need to empty the bowl underneath it and rinse it a couple of times to be sure you’ve cleaned it thoroughly.
When you’re satisfied with your cleaning job, you’ll be ready to move on to the next step.
5. Dry Out the Motor Completely
After you’ve finished cleaning the motor with either your motor cleaner or electrical contact cleaner, you’ll have to dry it out.
These are 6 steps I would follow when drying my RC motor.
- Take the container from the last step and wash it out completely with some gentle soap and warm water. Rinse it and dry it with a towel.
- You’ll want to sit the motor upside-down over the container or bowl you’re using so the remaining moisture can drip out and air dry for a few hours. It’d be a good idea here to either prop up the motor or hang it upside-down from a hook or makeshift clothesline of some kind so that it doesn’t end up sitting in its own filth. Another option you have is to rest the container at a slight angle with the motor sitting inside. Any moisture leaking from the motor will drip down towards the opposite side of the container rather than sit and stagnate in the same spot.
- If you’re a bit impatient, you could use a fan or even a hairdryer on a low setting to help dry out the motor faster. This way, you can speed up the slowest part of the process and get to the next steps, where you’ll put the motor back into your RC car and get it out on the road again for your next outing or race.
- When no more moisture leaks from the motor, pick up the motor with a clean towel and wipe it off as meticulously as possible. If you have cotton swabs around, you can use a few to very gently wipe down any areas you can’t reach with the towel. Be careful, though, as cotton swabs can shed, and you don’t want to get bits of cotton inside the motor.
- Sit the motor flat on a towel somewhere in direct sunlight for an hour or so, allowing it to finish drying completely. There shouldn’t be any liquid dripping from the motor at this point, and you shouldn’t be able to see any liquid or residue on the motor. This step is just to dry out any remaining pockets of slight moisture.
- Finally, you may opt to gently re-use the compressed air from the earlier steps in sporadic bursts to give your motor an exceptionally pristine cleaning. At this point, the motor is likely clean enough, but if it’s undergone some severe wear and tear or hasn’t been cleaned in a very long time, go for those last few blasts of compressed air to get rid of any remaining gunk hiding away in its many crevices and holes.
TIP: If you want to be extra confident the motor is dried thoroughly, though, go ahead and let it sit overnight for your peace of mind, as it won’t hurt the motor at all. Empty the container under it periodically so you can know exactly when all of the leftover moisture has dried out of the motor.
You’re almost ready to put the motor back into your RC vehicle, but we still need to address one last, crucial step to ensuring the motor will function correctly upon being reinstalled.
6. Lubricate the Motor
The last step before reinstalling your motor is to properly lubricate it. The Liberty Oil Products 100% Synthetic Lubricant is a synthetic lubricating oil designed specifically for RC hobbyist purposes. Amazon also has 3-IN-ONE Multi-Purpose Oil, which will keep your brushless motor running smoothly and silence your squeaky hinges.

By lubricating your motor, you will ensure it runs smoothly for years to come, provided you keep up with other maintenance such as regular cleanings.
Put a few drops of your preferred type of oil on the motor’s bushings and around the motor shaft. To be sure the oil coats the motor correctly, turn the motor shaft gently for a few spins. When you’re done, grab a paper towel or cloth to get rid of any remaining excess oil coating the rest of the motor.
Now you can rest easy knowing your motor has been cleaned properly, but you’re not done just yet; you still have to put the motor back inside the car.
7. Put the Cleaned and Oiled Motor Back Into Your RC Car
Finally, you can put the motor back inside your RC vehicle and look forward to your next run. This is why I stressed the importance of knowing precisely how you took apart the car in the beginning steps; now, you just need to do those steps in reverse to make sure the motor has been correctly reinstalled.
If you already know how to put the motor back into your car, then great! If you’re a bit unsure, though, you could refer to the notes, photos, or video I suggested you make during your initial motor removal process.
Make sure you haven’t lost your tray full of screws and other small parts, as you’re going to need them. Hopefully, none of the pieces fell or got lost in the process; if you’ve been diligent, however, this won’t be an issue.
You’ll need to set your gear mesh and put your pinion gear back on the motor shaft at the end. Pop the motor back into place and screw it back in. Ideally, your motor will now run quietly with no unusual noises or sputtering.
NOTE: If your motor makes any odd or loud sounds, your gear mesh has probably been installed too tightly. Try resetting the gear mesh and make sure the mesh isn’t too tight. You’ll also want to be sure it isn’t too loose, though, as a loose gear mesh can damage your vehicle and strip the gears.
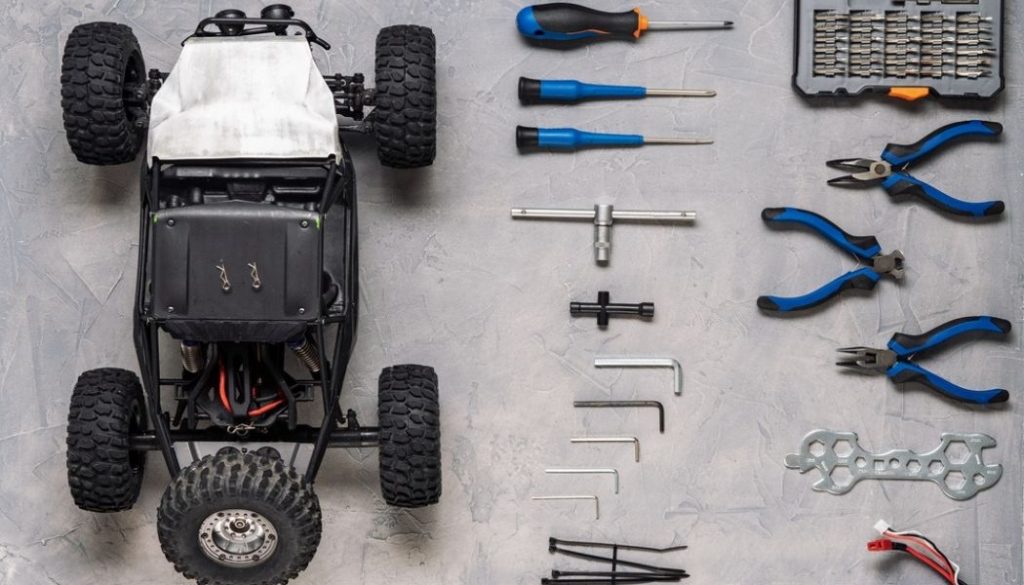
What Tools are Needed To Clean a Brushed RC Motor?
Cleaning your brushed motor in your RC car is a multi-step process, but it is surprisingly simple and doesn’t require any expensive or special tools. Most of what you’ll need to clean your motor will already be around your house or are cheaply available at home improvement stores or hobby shops.
To ensure a complete and thorough clean, you’ll need to remove the motor entirely, clean it with both compressed air and a motor cleaner, let it dry out overnight, and then finally reinstall the motor once it’s completely dry.
Before you get started trying to remove your RC car’s motor, I recommend you have the following items ready:
- Compressed air
- Motor cleaner spray
- A clean, soft-bristled toothbrush
- A Phillips head screwdriver
- An Allen wrench (also known as a hex key; the size needed may vary)
- Pliers
- A small container or bowl to put under the motor and catch residue as you clean it
- A tray to keep any small parts on while you work
- A towel to dry the motor on
Depending on your specific vehicle, you may or may not need all of the tools listed, but it’s a good idea to have them handy in case, particularly if you’re a beginner and haven’t cleaned your motor before.
Why Should You Clean Your RC Motor?
You should clean your RC motor to ensure your RC car lasts as long as possible, even if it’s a budget RTR or ready-to-run vehicle. Your RC motor will collect a large amount of dirt, dust, sand, grass, and other debris over time, causing it to wear down and eventually stop running entirely.
Cleaning your motor also ensures your RC car will run as fast as possible. If your car’s top speed is constantly hindered by a gunked-up motor, you’re not going to have as much fun with it as you would if it were clean and well-oiled regularly.
Finally, keeping your motor clean and oiled will mean you’ll get your money’s worth for your vehicle. Although brushed motors are generally less expensive than brushless motors, well-made RC cars can still be quite pricey, and any investments you make into this hobby should be worth both your time and your hard-earned cash.
How Often Should You Clean Your RC Motor?
Ideally, you should clean, dry, and oil your brushed RC motor as often as every two to three extended use runs or outings. Some enthusiasts prefer cleaning their motor every run, especially if they take their vehicle out for a run several times per week or more.
However, if you aren’t using your RC car very heavily or for more intense offroading or high-speed racing, you can get away with cleaning your motor every four or five runs–or even less often if your RC hobby is a more occasional sort of thing. Just use your best judgment based on my recommendations and how often you’re taking your RC car out for fun.