If your remote control car has some issues, fixing them can seem daunting. But fixing RC cars is very simple, and it’s an excellent way to learn some new skills.
If your remote control car isn’t working, you should first check the batteries; low charge, disuse, corrosion, or a faulty connection may often be the cause. Your RC not working may also be due to a problem with its steering, gears, fuel, wiring, transmitter, servo, or plastic parts.
If you’re looking for a remote control car repair guide that covers the most common issues with your RC car, you’re in the right place. In this article, we’ll talk about how you can troubleshoot and fix your remote control car in some simple steps. No matter what your RC car’s problem is, we’ll walk you through it so you can hit the road again.
How To Fix Battery Problems
If your RC car isn’t functioning correctly, the first thing you should check is the batteries. Usually, if the batteries are dead or low, your vehicle will lag behind the remote control, stop suddenly, or won’t move at all. Often, the cause of battery problems is a low charge, disuse, corrosion, or a faulty connection.
1. Replace or Recharge Your Battery
Naturally, the first thing you’ll need to check is the battery level. Several battery level problems can arise depending on whether your car uses a LiPo or alkaline battery to power the motors.
If you’re using a LiPo (Lithium-ion Polymer) battery, recharge it. If this doesn’t fix your issue, you may want to get a newer battery and ensure that you store it correctly. LiPo batteries should have no more than a 50% charge when you’re not using your car. Leaving too much charge on your battery when you’re not using it can exhaust it and decrease its performance over time.
Also, if you let your LiPo battery charge go down to 0%, your battery will be permanently damaged, and it could overheat your car, so never let your LiPo battery die. Otherwise, it may stop working altogether.
To keep your battery in the best condition, use a battery charger with a storage charge setting. These chargers will keep your battery at 50% while on the charger and never let it die or overcharge.
If your car takes alkaline batteries, replace them. Make sure to check the batteries in your remote control and the vehicle and ensure that they’re fresh and installed correctly.
2. Fix Issues From Disuse
Like real cars, RC cars can lose battery charge if you don’t use them for a long time. That’s because RC cars have an alternator built-in. If you leave the batteries unused for many weeks at a time, the batteries won’t be able to recharge themselves.
If this is your problem, you can replace or recharge your batteries and take them out of your RC car when you finish using it. Removing the batteries will conserve their energy and keep them from dying.
3. Remove Corrosion and Rust
If your batteries still have a charge but seem not to be working well, or if you haven’t used them for a very long time, they may have corroded. Usually, this happens if you don’t use your car for a long time, and the sulfuric acid and water leak from your batteries. This acid reacts with the metal battery contacts in your vehicle to form a white crust, which keeps your batteries from connecting with and powering up your devices.
If you leave corrosion on your battery contacts, it could damage the metal components of your RC car. So, anytime that you see corrosion, it’s best to clean the battery contacts and replace your batteries immediately.
To clean off corroded battery contacts, you’ll need a toothbrush or cotton swab, vinegar or lemon juice, and baking soda. To do this:
- Remove and recycle your corroded batteries from your RC car.
- Dip your toothbrush or cotton swab into vinegar or lemon juice and scrub the battery contacts. The acidic liquid will dissolve the sulfuric acid.
- Put a pinch of baking soda onto the battery contacts, add a drop of water to form a paste, and let it sit for at least five minutes.
- Use your toothbrush or cotton swab to rub the baking soda onto the contacts, then wipe away the baking soda.
- Allow the battery compartment to dry before you put new batteries in your RC device.
This method also works for rusted battery contacts. It would be best if you cleaned off rust immediately after it becomes visible to prevent damage to your electronic devices.
4. Correct a Faulty Connection
If your RC vehicle takes a LiPo battery, you should check to ensure that the wires and connectors aren’t frayed, exposed, or damaged. If you see a problem with your battery, you should repair it immediately or replace the whole battery.
If your battery contacts are damaged or overly rusted, you may need to replace them to get enough power to drive your car.
How To Fix RC Car Steering Problems
If your car keeps veering in one direction, won’t go in the direction you tell it to, or doesn’t steer at all, you probably have an issue with your transmitter, servo horn, or your transmitter’s endpoint adjustments.
1. Check Your Steering Rate
If your steering is going wonky, the first thing you should do is check the steering rate on your transmitter. Sometimes, while you’re driving, you might accidentally set the steering rate to zero, which will make it impossible for you to steer your vehicle.
2. Align Your Servo Horn
If you constructed your car yourself or put your vehicle through hard wear, the servo horn may be out of line with the chassis. The servo horn is the rod that connects to your car’s steering arm, and it should always be perpendicular to the chassis so that it can direct your vehicle.
If your servo horn isn’t perpendicular to the chassis or is off-center, you may experience steering issues like your car not turning in a specific direction or turning less sharply in one direction. To align your servo horn:
- Open up your vehicle.
- Turn on your transmitter, then set the steering trim to 0.
- Turn on the car.
- Test the steering.
- Remove the servo horn, which is a small plastic arm at the top of the servo.
- Get the servo horn as straight as possible, then snap it back onto the servo.
- Test your car’s steering again and repeat steps 5- 7 until the steering is just right.
3. Reconfigure Endpoint Adjustments (EPA)
Many top-of-the-line RC vehicles allow you to make endpoint adjustments, which determine the turning axis of your vehicle. If your car cannot turn sharply or steers too sharply, you may need to reset your EPA. If your vehicle has the wrong settings, you may hear a rumbling sound when you try to steer, which could overextend and damage the servo.
You can adjust each vehicle’s EPA differently depending on the make and model of your RC car. Generally, though, this is how to reset your endpoints:
- Set your vehicle on flat ground.
- Turn on your transmitter, then turn on your car.
- Find the EPA settings in your transmitter.
- Reduce your EPA settings to 50% for both the left and right sides of your vehicle.
- Now, turn your left wheel entirely while you gradually increase the EPA percentage. Continue to increase the percentage until your tires have stopped moving.
- Complete steps 5 and 6 for the right side of your vehicle.
How To Fix Gear Issues
If you hear a grinding sound coming from your RC car or if the steering isn’t working the way it should be, you probably have a gear problem. With such small gears, even a grain of sand can obstruct your wheel’s rotation, causing a problem with your steering. Gears can also fall out of place, making one or more wheels lose power.
1. Unjam Your Gears
If one or more of your wheels gets jammed, stop using your car immediately to avoid motor burnout. Open up your vehicle and inspect the servos with a flashlight. You can use compressed air to clear out dirt or use a pick to remove any pebbles or leaves that are obstructing your car’s gears. You may be able to dislodge larger or stubborn debris from the gears by gently jiggling the wheel back and forth.
2. Realign Slipped Gears or Slipped Pinion Gear
Slipped gears will result in a dead wheel. When this happens, the gears are disengaged. Your wheel will still spin, but it won’t get any momentum from the motor inside. Also, you’ll probably hear the gears clattering on the engine when you drive your car if one of them has slipped.
If you find that your car’s gear has fallen out of place, remove your car’s case and gently thread the loose gear back into place. Then, give the wheel a spin to ensure that it won’t pop back out.
If none of your wheels move, your motor’s pinion gear may have slipped or become stripped. Often, you can tell if this is the problem if your car emits a whirring sound when you try to accelerate, but it won’t move. Take a look at your motor and ensure that the pinion is meshing with the other servo gears. If it’s stripped, you’ll need to get a new one.
3. Replace Stripped or Damaged Gears
Sometimes RC gears can become stripped, which means that you’ll have to replace them. Use a flashlight to inspect your vehicle’s gears and look for cracks or smoothed-out edges. If your gears seem to be stripped, remove them from your RC car so that you can find a replacement.
When looking for a replacement part, you’ll need to make sure that you get the right gear for your car since it’ll have to match the other gears. If you get a new gear that’s too small or large, your vehicle won’t drive straight. In addition, the teeth will have to match up with the other gears in your servo, or you’ll have to deal with slipped gears every time you drive your RC car.
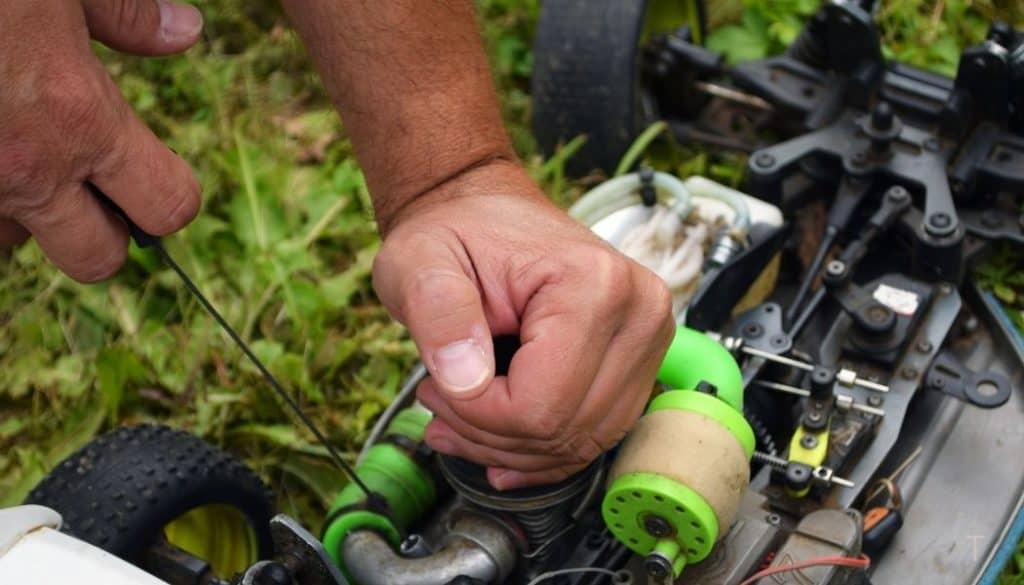
Adding Fuel
If your RC car runs on oil or fuel, you might need to take some extra steps to ensure it always functions correctly. If your vehicle isn’t running well, check to see if it needs fuel and top the tank off. If filling up the tank doesn’t fix your power problem, the fuel line might be kinked, blocked, or damaged.
Trace your fuel lines to ensure that none of them are kinked or cracked. If one of them is broken, you can use clear nail polish to seal it or replace it with a heavier duty hose like a chainsaw or power tool fuel line. To avoid any further damage, ensure that the lines aren’t next to any gears and use a zip tie to secure them if they are.
Also, you may need to give your car an oil change if it’s not running at peak performance. You may also want to think about changing the oil in your car’s shocks. If your vehicle seems to be leaking oil, the shock cap is probably cracked. If that’s the case, you’ll need to replace this cap as soon as possible to avoid dangerous conditions.
How To Repair RC Car Wiring Problems?
The most common wiring problem is an open circuit. Open circuits aren’t grounded, which means the electricity that should be powering your vehicle cannot make it to one or more components such as the transmitter or motor since it’s escaping through a loose wire. If one or more of the wires in your RC vehicle have become loose, frayed, or disconnected, the circuit will be open.
To check for and fix open circuits, open your car and disconnect the power. Then, use a flashlight to trace each wire, keeping an eye out for frayed, stripped, or disconnected cables.
Additionally, you can use shrinkwrap or electrical tape to seal the outside of the wire in order to fix frayed or stripped wires. If the wire looks burnt or permanently damaged, you may need to replace it.
NOTE: If a wire has become disconnected, you’ll need to resolder it or screw it back in place if there’s a screw for it. Moreover, use zip ties to secure the wires in your vehicle gently to prevent further wiring problems.
How To Fix Transmitter Issues
RC cars use a radio signal to communicate with remote controls. Sometimes, if your vehicle isn’t responding to the transmitter, it may be turned off. So, check to ensure that you’ve turned on the transmitter and your car. That might seem like a no-brainer, but you’d be surprised how often it gets overlooked.
1. Adjust and Strengthen Radio Frequencies
If your transmitter is on, make sure that your remote control and car and transmitter are set to the same frequencies. If you recently bought a new remote control for a vehicle that didn’t come with a transmitter, you should always ensure that the transmitter frequencies match perfectly. You can find this information in your user’s manual or via a quick search about your model.
If your transmitter is still not working, check your antenna. The antenna is crucial when you’re steering your car since it amplifies the radio frequencies. So, to ensure that it works, move very close to your vehicle and extend your antenna all the way if it’s telescopic.
If there’s a crack in your antenna, or if you want to boost its strength, you can use small pieces of duct tape to attach aluminum foil to it.
If none of these tips fix the problem, check whether your RC car works with another transmitter or if your transmitter works with another RC car. Doing so will help you identify where the issue lies. If the problem is your car, you might have an issue with a wiring connection or one of your servos. If it’s your transmitter, it may not be using the right frequency for your vehicle.
2. Fix Faulty Receiver Wire Connections
You can easily open up your RC car to check if any of the receiver’s wires have come loose. When you take the top off of your vehicle, take a picture of the circuit board to ensure that you reconnect everything properly.
Most RC cars use small plastic hooks to connect wires to the transmitter, so you should look for these. Check to see if the wires on the circuit board are connected correctly and if the little copper plates on the receiver are in the right place. If anything looks loose, disconnect the vehicle’s power or remove the batteries. Push the wires back in place, then check to see if your transmitter starts working.
How To Fix Servo Problems
If there’s something wrong with one or more of your servos, your car will only respond to some of your directions. For example, if your car turns its wheels but won’t move forward, one of your servos is likely broken.
Servos include a motor, an ESC (electronic speed controller), and the gears that make your car’s wheels spin. They can be damaged when the engine overheats, when the wires burn out, or when one or more gears are damaged.
To diagnose a servo problem, open up your car and plug a new servo into the power. If the new servo works, you have a servo problem. If not, you may have a power problem.
1. Replace Burnt Out Servo Wire
If a large current of power goes through the wire that connects your servo to your battery, the wire can burn out, fray, and melt. If your servo wiring is burnt, you’ll need to get a new wire to replace the old one.
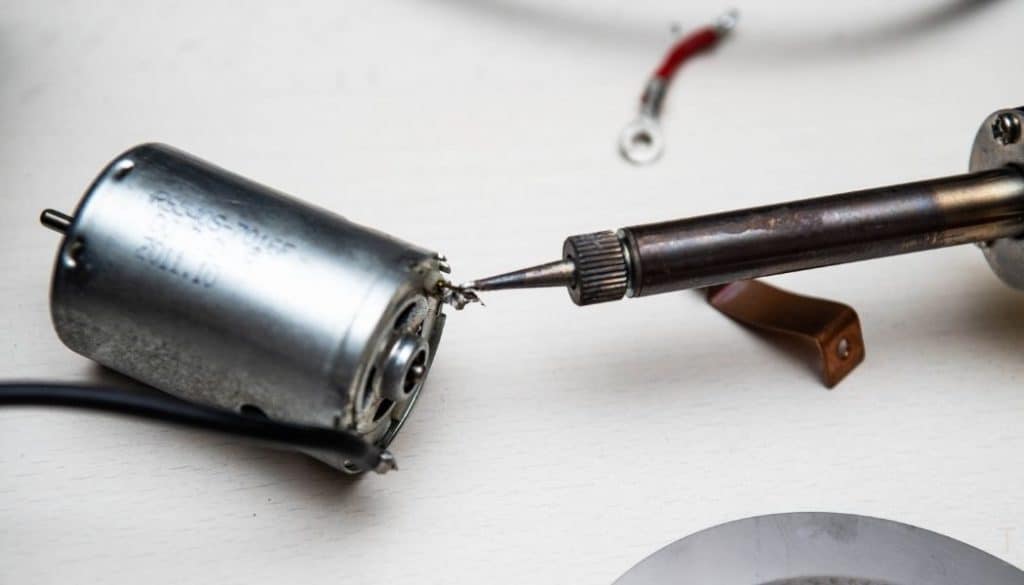
2. Replace Your Motor
Motors can burn out for many common reasons. These include a gear obstruction, overpowering your car, running the engine for too long, wear and tear, and many other causes. Accordingly, motors are very easy to fix. So, if one or more of your wheels won’t turn when you try to move your RC car, try replacing your motor.
If you want to replace your motor, you’ll need to find the right one for your car. If you get the wrong size, you could damage the gears or ESCs in your servos. Most remote control cars will specify their motor type in their user manuals, and you can also usually find the specs on your remote control car with a quick internet search.
To replace your motor:
- Open up your car.
- Remove the battery.
- Disconnect your motor’s red and black power wires for the power source.
- Remove your gear cover with a screwdriver or Allen wrench. This cover is usually on the back of your vehicle.
- Remove the two motor screws and their washers.
- Remove the pinion gear from your motor.
- Get your new motor and put the pinion gear on it, securing it tightly.
- Put the motor in place on your car and replace the two screws and washers.
- Make sure your motor pinion is flush with the other gears on your servo.
- Reconnect the power wires to the power source.
- Replace the gear cover and screw it into place.
- Put the cover back on your car, connect the battery, and you’re done!
3. Resolve ESC Issues
The ESC controls the speed that your motor will turn at. When the ESC is faulty, your engine will twitch back and forth instead of spinning. If you want to diagnose an ESC issue, you’ll need a voltmeter. To test your ESC:
- Locate your ESC, a small board with four or more traces, which look like tiny black chips, soldered onto it.
- Using your voltmeter, check both the positive and negative sides of the motor outputs on the board for continuity issues.
- If you have continuity, one or more of your traces has burned out. If this is the case for your vehicle, you can either replace the traces or buy a new ESC.
If some of your traces are burnt out, and you want to repair it yourself, all you need to do is melt off the faulty trace with a hot air gun and replace it. Still, you can also just buy a new ESC for your RC car if you don’t feel confident fixing it yourself.
If you want some tips on testing and correcting your ESC, check out this video from Drone Mesh on ESC repair:
How To Fix Plastic Gears and Other Parts
Plastic is easy to break, and when it comes to remote control vehicles, a broken plastic piece could end up causing more damage. Fortunately, if your RC car has cracked or damaged plastic parts, it’s pretty straightforward to fix them.
Repair Plastic Gears
The plastic gears that engage your wheels are essential. If one or more cracks, you could overexert your vehicle’s motor or servo, which could cause more problems for you, such as overheating your motor or breaking the servo horn.
Luckily, fixing plastic gears is very simple. To repair cracked or broken plastic gears, glue them back together with a premium, high-strength glue. I recommend a 2-part epoxy glue like J-B Weld’s Original Cold-Weld Epoxy (available on Amazon.com) since it’s much more durable than plastic.

If you don’t want to buy glue but have a soldering iron, you can solder your gear back together. To solder plastic gears:
- Fit any fragments back into your gear and hold them tightly in place.
- Tightly encircle the gear’s teeth with a piece of tape to keep everything where it belongs.
- Heat your soldering iron, preferably on high heat.
- Stick the tip of the soldering iron in the cracked plastic. Gently move from side to side to melt the crack back together.
- Smooth the gear’s surface by running the side of the soldering iron flat against the gear’s crack.
- Let the plastic cool and remove the tape.
Seal Faulty Tires
If your tires are cracked or have a hole, you can patch them up to avoid buying new ones. You’ll need some tire glue, like Traxxas 6468 Ultra Premium Tire Glue (available on Amazon.com), made just for RC vehicle tires.

To patch your tires:
- Use gloves and extreme caution when using glue as strong and fast-drying as tire glue.
- Get a paper towel and put your torn tire on top of it.
- Open your tire glue and cover the crack or hole with it.
- Use the paper towel to wipe away the excess adhesive.
- Let the tire dry.
Fix Superficial Damage
If your car’s case is cracked or broken, use J-B Weld’s Original Cold-Weld Epoxy, which is strong enough to withstand high stress. Using it on areas of your car that might get extra wear and tear, like the bumper, around the tires, or the chassis, is always a good idea if you want to strengthen your vehicle. You can also use it to reinforce wiring connections. Just put a drop on top of soldered wires to seal them permanently.
Read Next
- RC Car Scales
- How To Increase the Range of Your Remote Control Car
- How To Build an RC Car?
- Traxxas RC Vehicles Buying Guide
- How To Build an RC Track?
- RC Car Tires Buyer’s Guide
- How Fast Can RC Cars Go?
- Can I Use the Same Gas in My RC Car and Regular Car?
- Tips To Travel With RC Vehicle
- What are main Differences Between Brushed and Brushless RC Motor
- Tips on cleaning a Brushed RC Motor